Sunday, December 28, 2014

Hot Cocoa Cupcakes


Hot cocoa is one of the things about winter that I really love and look forward to throughout the year. I have never really been a huge fan of winter otherwise; don't get me wrong, I love the winter sports and fashion and the pretty snowfall, but other than that winter has always just been the season that I want over soonest. That being said, these cupcakes are inspired by one of my only favorite things about winter. I was highly tempted to eat one while drinking hot cocoa, but my waistline told me I better not. 


Hot Cocoa Cupcakes


Yields 24+ {about 30}

Cupcakes:


1 cup butter

1/2 cup semisweet chocolate chips

1 cup - 2 tbsp unsweetened cocoa powder

2 tbsp hot cocoa powder

1 1/4 cup all-purpose flower

1/4 cup cornstarch

1 teaspoon baking soda

1 1/2 teaspoon baking powder

4 eggs

1 cup granulated sugar

1/2 cup brown sugar

2 teaspoons vanilla

1 cup almond milk


Frosting

1 cup butter

2-3 cups confectioner's sugar

Marshmallow {see recipe below}


Marshmallow:

1 egg white

3/4 cup corn syrup

1 cup confectioners' sugar

1 tbsp vanilla


Directions:


Melt the butter and chocolate together in the microwave.

In a medium bowl, whisk together the cocoa powder, flour, cornstarch, baking soda, and baking powder.

In a large bowl using an electric mixer, beat the eggs, sugar, brown sugar, and vanilla together until smooth.

Add the cooled butter/chocolate and beat until smooth.

While still beating, add half of the flour mixture, then half of the almond milk.

Repeat until everything is added. Stir until just combined

Bake on 350 for 20-25 minutes


Make the marshmallow by beating the egg white on high for about 5 minutes to form stiff peaks. Beat in the corn syrup.

Beat in the confectioner's sugar a little at a time until it is completely combined. Beat in the vanilla, and continue beating for 2 to 3 minutes until the marshmallow has a fluffy texture {and when I say "fluffy" I mean like fluff, the marshmallow spread; I am hilarious}.


For the frosting, beat the butter alone for about 2 minutes, then add the confectioner's sugar a half cup at a time until the two of them are combined.

Slowly beat in the marshmallow.

Pipe the frosting with a circle tip onto the cooled cupcakes.


Top with peppermint bark and drizzled chocolate.


Thursday, December 11, 2014

Chocolate Creme Brulee Cupcakes


It has been an absolutely insane amount of time since I have written a blog post, and that makes me so sad! I have been so busy baking for the holidays, and taking those stupid final exams, that finding a couple hours of sunlight to bake and take pictures is nearly impossible! Also I got a job as a retail photographer {yayy! not like anyone cares, but whatever}, but unfortunately my personal camera is broken and I cannot afford a new one so some of these pictures are out of focus :(.  Ok, so back to talking about the recipe. Chocolate and Creme Brulee are two of my most favorite things ever! The recipe for the custard I used in these cupcakes is actually the recipe that I use to make Creme Brulee in general, so I assure you it is just magical. I hope you enjoy these as much as I do!


Chocolate Creme Brulee Cupcakes

Yields 24+ {about 30}


Cupcakes


1 cup butter

1/2 cup semisweet chocolate chips

1 cup unsweetened cocoa powder

1 1/4 cup all-purpose flower

1/4 cup cornstarch

1 teaspoon baking soda

1 1/2 teaspoon baking powder

4 eggs

1 cup granulated sugar

1/2 cup brown sugar

2 teaspoons vanilla

1 cup almond milk


Custard:


1 tbsp vanilla 

2 cups heavy cream

1/2 + 1 tbsp granulated sugar

5 egg yolks

1/4 cup brown sugar


Directions:


Melt the butter and chocolate together in the microwave.

In a medium bowl, whisk together the cocoa powder, flour, cornstarch, baking soda, and baking powder.

In a large bowl using an electric mixer, beat the eggs, sugar, brown sugar, and vanilla together until smooth.

Add the cooled butter/chocolate and beat until smooth.

While still beating, add half of the flour mixture, then half of the almond milk.

Repeat until everything is added. Stir until just combined

Bake on 350 for 20-25 minutes


Use a melon baller or a teaspoon paring knife to core the cupcakes. This is where the custard is going to go.


Now for the custard. In a medium heavy-bottomed saucepan, bring the vanilla, granulated sugar, and one cup of the cream to a boil. Stir almost continually to avoid a skin forming. After the mixture has boiled, set aside to cool for about 10 minutes.

After the time has gone by, pour the remaining cream into the mixture to help cool it down. Whisk while pouring.

In a medium bowl, whisk the egg yolks to break them apart. While still whisking, pour the cream mixture into the bowl. Whisk until everything is evenly combined.

For the water bath, put a kitchen towel in a roasting pan, and fill it with about an inch of hot water. Pour the custard into ramekins, put the ramekins into the water bath, and put the water bath into the oven. 

Bake on 300 for 30 minutes.

They will be done when the jiggle slightly when shaken.

Take them out of the roasting pan and put them on a rack to cool. 


Assembly:

Using a spoon, scoop some of the cooled custard into the cored cupcakes.


Pinch some of the brown sugar in your fingers and sprinkle it on top of the custard.


There is the blurry picture I warned you about! :(

Using a kitchen torch, caramelize the sugar on top of the custard.

And lastly before the sugar cools, place a raspberry (or other garnish) on top so it sets into the hardened sugar.


Saturday, November 8, 2014

Pumpkin Spice Cupcakes


Nothing says "fall" quite like anything and everything pumpkin spice! These pumpkin spice cupcakes are no exception, and the cream cheese frosting on top makes them even better! Hopefully these cupcakes will keep you in the fall mood {it is November, after all!} while the malls and stores are already playing their Christmas music. 


Pumpkin Spice Cupcakes

Yields 24+ {about 30}

Cupcakes:

2 cups all-purpose flour

1/3 cup cornstarch 

1 tsp baking powder

1/2 tsp baking soda

2 tsp cinnamon

1 tsp cloves

1 tsp nutmeg

1/2 tsp ginger

3/4 cup butter

2 cups granulated sugar

1/2 cup brown sugar

1 tsp vanilla

3 eggs

1 (15 oz) can pumpkin

1 cup almond milk


Frosting:

1 cup butter

3 cups cream cheese

1 tsp vanilla

4-6 cups confectioners' sugar


Directions: 

Sift and then whisk together the flour, cornstarch, baking powder, baking soda, cinnamon, cloves, nutmeg, and ginger. Set aside.


Beat together the butter, white sugar, brown sugar, and vanilla until light and fluffy. Beat in the eggs one at a time. When all of the eggs have been added and combined, add the pumpkin and mix until thoroughly combined. 


While still beating, add half of the flour mixture, then half of the almond milk.

Repeat until everything is added. Stir until just combined

Bake on 350 for 20-25 minutes


For the frosting, beat together the butter and sugar until smooth without any lumps of butter. Beat in the vanilla.

Add the confectioners' sugar one cup at a time and beat until you achieve your desired texture/thickness with the sugar. If your frosting is not firming up because of the surrounding temperature {if your house is really warm}, put the frosting in the refrigerator before frosting your cupcakes.

Frost the cupcakes with a star tip, and top with sprinkled cinnamon.


Tuesday, October 28, 2014

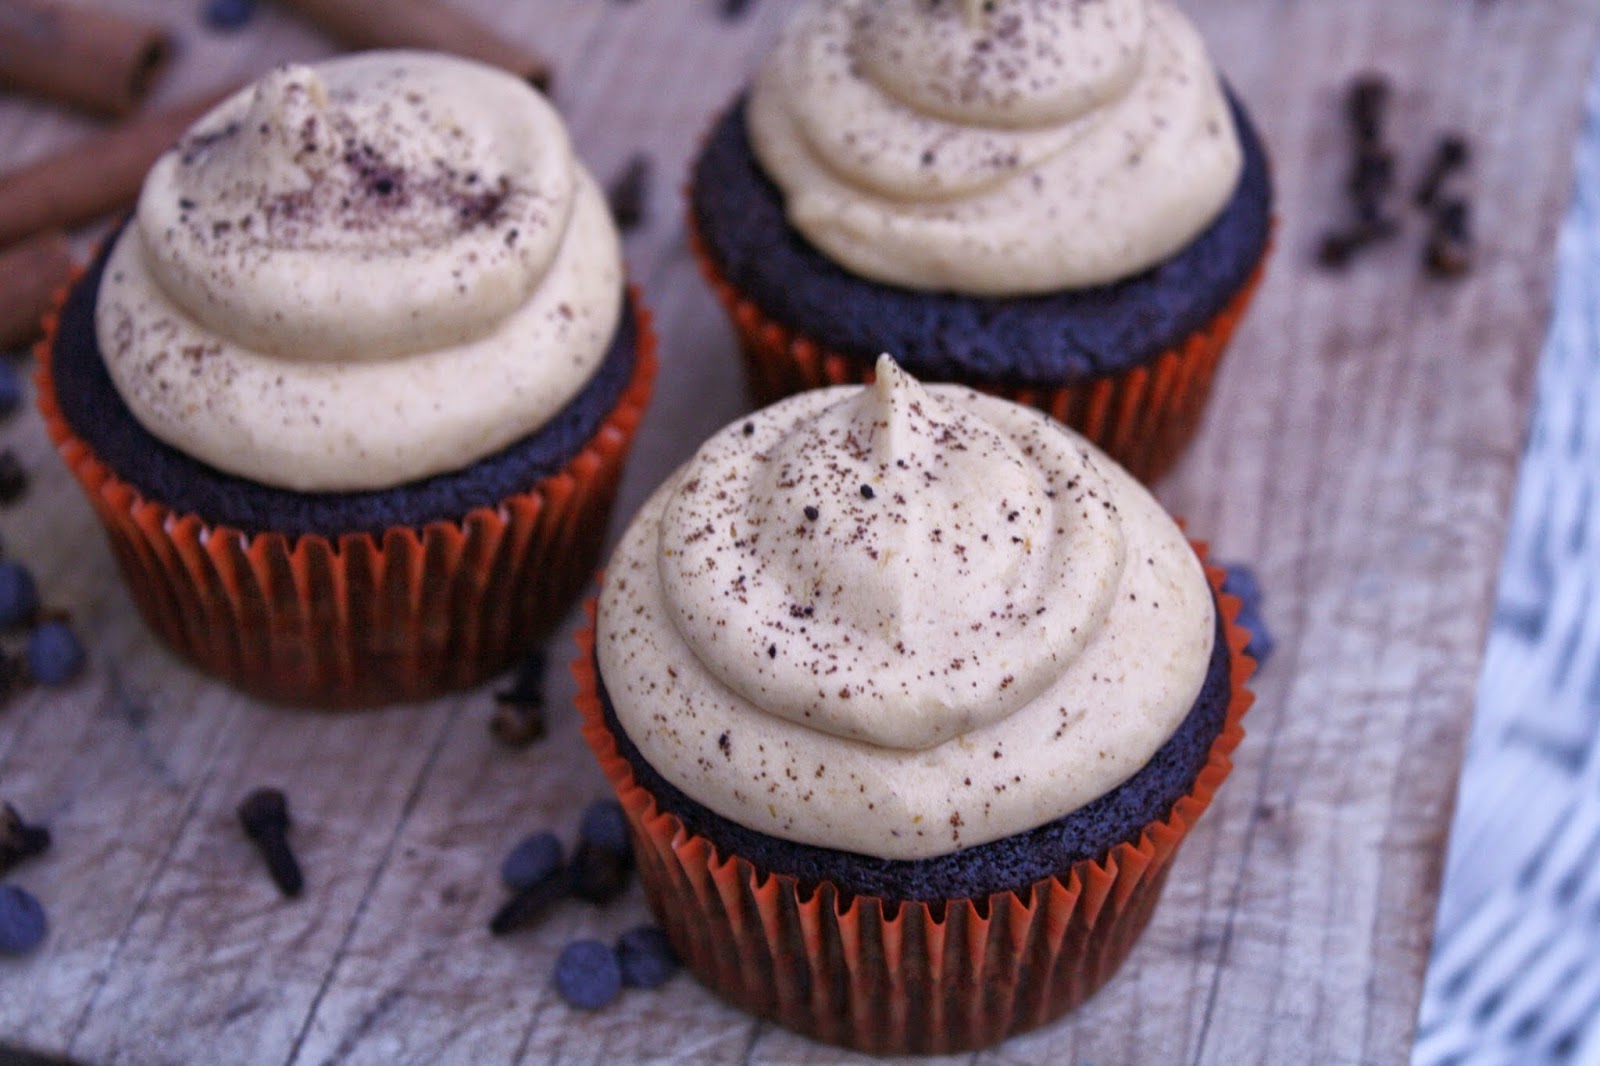
Mocha Pumpkin Cupcakes


Apple season has almost wrapped up, and now it's time for pumpkin! Everyone loves pumpkin coffee, and I really love chocolate, so why not have mocha pumpkin? The espresso powder added to the chocolate makes it extra rich, and the pumpkin frosting is a perfect seasonal balance to it! Enjoy!


Yields 24+ {about 30}

Cupcakes:


1 cup butter

1/2 cup semisweet chocolate chips

1 cup unsweetened cocoa powder

1 tbsp finely ground instant espresso powder

1 1/4 cup all-purpose flower

1/4 cup cornstarch

1 teaspoon baking soda

1 1/2 teaspoon baking powder

4 eggs

1 cup granulated sugar

1/2 cup brown sugar

2 teaspoons vanilla

1 cup almond milk


Frosting:

1/4 cup butter

1 1/2 cups cream cheese

2 tsp vanilla

1/2 cup pumpkin

1 heaping tsp cinnamon

1/2 heaping tsp cloves

3 cups confectioners' sugar


Directions:


Melt the butter and chocolate together in the microwave.

In a medium bowl, whisk together the cocoa powder, espresso powder, flour, cornstarch, baking soda, and baking powder.

In a large bowl using an electric mixer, beat the eggs, sugar, brown sugar, and vanilla together until smooth.

Add the cooled butter/chocolate and beat until smooth.

While still beating, add half of the flour mixture, then half of the almond milk.

Repeat until everything is added. Stir until just combined

Bake on 350 for 20-25 minutes


For the frosting, beat together the butter and cream cheese until it is smooth with no lumps of butter. Beat in the vanilla and pumpkin.

Add the sugar a cup at a time until all beaten in. Add the cinnamon and nutmeg and beat well.

Pipe with a circle tip and top with sprinkled espresso powder.


Wednesday, October 15, 2014

Caramel Apple Cheesecake


Ok, so I've been on a bit of an apple kick lately, but who can blame me? Apple season is almost over, and I've been waiting for it all year! This cheesecake is so yummy and great, because unlike most cheesecake recipes that I've come across in my years of cheesecake-making it does not need to rest over night! It can if you want it to, but it is not required. I love this because I can make it in the morning and bring it to a party at night...it just makes my life easier. The caramel and apples on top are marvelous too! I do recommend not topping it until you are ready to serve it, that way it won't get soggy in the mean time.


Caramel Apple Cheesecake


Yields 1 9" cheesecake

Cheesecake and Crust:

About 2 packages {not boxes!} graham crackers {enough for about 2 cups crumbs}

1/3 cup butter

1 tsp cinnamon

dash of nutmeg

32 oz cream cheese

1/2 cup plain greek yogurt

1 1/4 cup sugar

2 tsp vanilla extract

5 eggs


Apples:

1 cup apple juice

3 tbsp brown sugar

1 tbsp butter

2 tsp vanilla extract

5-6 medium apples


Caramel Sauce:

1 1/4 cup sugar

1/4 cup brown sugar

2 tbsp water

2 tbsp apple juice

1 tsp vanilla extract 

1 cup heavy cream


*Important!!! Use a 9" springform pan to make this recipe. To make taking the cake out of the pan easier, I suggest stretching parchment paper over the bottom of the pan and then closing the edges of the pan around it, leaving some of the paper visible from the outside of the pan...that way you can just take it off of the bottom and move it to a plate without breaking it. You could also use a cardboard round to do this. *


Directions:


Using a food processor or a rolling pin and Ziploc bag {the old fashion way!}, crush the graham crackers until you have crumbs. Pour the crumbs through a sieve so the crumbs are small and smooth. 


It's good to sift the crumbs because if you have big chunks of graham cracker in your crust that one point can get soggy or too hard, and the crust won't be uniform. Technically you don't need to sift the crumbs, but it helps improve the overall quality of your cake. You need about 2 cups of crumbs {it's good to have a little more than that}, so definitely re-crush the crumbs that were too big to fit through the sieve. 

Add the cinnamon and nutmeg to the bowl that the crumbs are in, and mix with a fork until evenly combined.

Melt the butter in the microwave. Pour the melted butter into the graham cracker crumb mixture, and mix with the fork or your fingers until all of the crumbs are moist. Pour them into the prepared springform pan and press evenly around the bottom and up half of the side of the cake pan. 


Wrap around the outside with tin foil and freeze while you make the cake part.


Preheat the oven to 475. Prepare a water bath for the cake pan by filling a large pan {I used a roasting pan} with about an inch of water. While the oven takes an eternity to heat up, start making the cake.

In a large bowl, beat together the cream cheese, yogurt, sugar, and vanilla until completely combined. Beat in the eggs one at a time. 

Pour the batter evenly over the crust. Put the cake in the water bath, and the water bath in the oven.

Bake at 475 for 15 minutes, then turn the oven down to 350 and bake for 50-60 minutes or until it only jiggles slightly when the pan is gently shaken.

Take out of the water bath and cool for a few minutes, then cover and refrigerate for 4 hours before serving.

For the apple topping, peel and thinly slice 5 to 6 medium apples.


I used several different kinds of apples to improve the flavor.

Put the apple juice, butter, brown sugar, and vanilla into a large sauce pan over medium heat. Melt the brown sugar and butter, and bring the mixture to a boil. 

Once the apple juice has been boiling for 2-3 minutes, add all of the apples into the saucepan. 


Stir with a wooden spoon and cover all of the apples with the apple juice. Stir occasionally and let lightly boil for 10-15 minutes until the apples have softened.


Use a slotted spoon to take the apples out of the liquid and put on a plate to dry and cool down.

For the caramel sauce, put both of the sugars, water, and apple juice in a medium sauce pan. Dissolve the sugars over medium heat. Add the vanilla, and bring to a rolling boil.


Let the sauce boil for 3-5 minutes until it has a dark caramel color. While whisking, slowly pour the cream into the boiling caramel and keep whisking until it is combined. Remove from the heat and cool to warm before putting it on the cheesecake.


Assembly:

Run a smooth butter knife around the inside of the pan to prevent the cheesecake from sticking to it. Remove the sides of the pan, and transfer the cheesecake to the plate you will be serving it on. I like to also remove the bottom of the pan, but you can choose to leave it underneath the cake.

Pile the apples on top of the cheesecake.


I recommend waiting until you plan on serving to pour the caramel on top, as you don't want the cake to get soggy. If the caramel sauce is cooled down to warm, pour it on top. 


If you have extra caramel sauce, save it in a small pitcher so you can offer it per slice. Enjoy!

Wednesday, October 8, 2014

Spiced Apple Cake


Yay! My first fall recipe!!! I don't know about where you live, but here in New England the apples are ripe for the picking, and I absolutely LOVE apple picking. It was always one of my favorite childhood memories; my dad would always take me and my sisters apple picking with my grandpa and aunt {both of whom have passed}, so apple picking is a time when I get to think back onto all of the good times we got to have with them while they were still here...it really puts me in a thankful mood even though Thanksgiving isn't here yet :). This Spiced Apple cake was made especially for my wonderful dad's birthday! I know he liked it, so I hope you do too.


Spiced Apple Cake


Yields 3 8" cakes


Cakes:

1 3/4 cups all-purpose flour

2 tsp baking powder

1/4 cup cornstarch

1 tsp cinnamon

1/8 tsp nutmeg

1 cup almond milk

4 eggs

2 cup sugar

1/4 cup sweet cream, salted butter {softened}

1 tsp vanilla extract


Frosting:

2 cups butter

4 cups confectioner's sugar

2 tbsp vanilla


Spiced Apple Topping:

4 medium sized apples

2 tbsp butter

2 tbsp brown sugar

2 tsp lemon juice

1 tsp cinnamon 

1/4 tsp nutmeg

about 1 cup water


Directions:


In a medium bowl, whisk together the flour, cornstarch, baking powder, nutmeg, and cinnamon; set aside.

In a small bowl in the microwave, melt together the almond milk and butter; set aside to cool.

Beat the sugar and eggs with an electric mixer until all of the sugar is combined, then add the vanilla extract.

While still beating, alternate adding half of the flour mixture, then half of the butter/milk mixture until they are both completely combined. 

Fill cake pans halfway, and bake on 325 for 30-35 minutes.


While the cakes are baking, make the apples so that they have time enough to cool down.


For the apple topping, peel and cube the 4 medium apples. 

Put the cubed apples in a large saute pan with the butter and brown sugar. Melt the butter and sugar over high heat; stir constantly to make sure all of the apples get coated.

Once the butter is melted, add the lemon juice and keep stirring. Make sure the apples are not sticking to the bottom of the pan!

If the apples at any point start sticking to the pan, add a little water to put some moisture back into it.

After 3-5 minutes, test an apple with a fork to see if it is tender {like it would be if it had been baked into an apple pie}. If it is not, let it saute for a little longer. If it is, add the cinnamon and nutmeg. Make sure all of the apples get evenly coated with the spices!

The cinnamon will most likely pull a lot of the moisture out of the apples, so add a little bit more water until you have the consistency you want.


Set the apples aside to cool while you make your frosting.


For  the frosting, beat the butter until it is smooth and fluffy {about 5 minutes}.

One cup at a time, beat in the confectioner's sugar. Make sure you scrape down the sides of the bowl after each addition so that the end result won't be lumpy.

After all of the sugar is added, beat in the vanilla extract.


Assembly:

Pop the cakes out of the pans onto cardboard rounds {this just makes transporting easier}. Put the first cake onto a cake stand, or whatever else you will be serving your cake on.

Pipe the frosting {without using a tip, just the bag} onto the cake starting from the center in a circle until the whole top is covered, leaving about 1/2 inch of room on the edges. Repeat with the other layer, and place the final layer of cake on top.


Pipe the same kind of circle on the top of the cake, but leave a little more room around the edge. Smooth out the piping job with a butter knife with a flat edge or a small metal spatula.


Hopefully your apples have cooled by now, but if they haven't just pop them in the freezer for a minute.

Pour/spoon the cooled apple topping onto the top of the cake. Don't be afraid to pile it on! There shouldn't be any apples left over {unless of course like me, you ate a few :P}.


Enjoy this yummy fall-time cake with some cider!

Monday, September 29, 2014

White Chocolate Amaretto Cupcakes


These cupcakes were a little bittersweet for me, only because I feel like these will be my last un-seasonal cupcakes *tears, but maybe happy tears?*. You can definitely be expecting plenty of pumpkin spice, maple sugar, and cranberry cupcakes in the near future. These cupcakes are great if you have a sweet tooth! The almond and white chocolate are sweet, but the raspberry sauce is tart and makes it complete. The raspberry sauce is also really easy, and yummy on ice cream.


White Chocolate Amaretto Cupcakes


Yields about 24


Cupcakes:

2 cups all-purpose flour

1 tbsp baking powder

1/4 cup cornstarch

1 1/2 cup almond milk

4 egg whites

1 1/2 cup sugar

1/2 cup sweet cream, salted butter {softened}

1 tsp vanilla extract

1 1/2 tsp almond extract


Frosting:

1 cup butter

4-5 cups confectioners' sugar

1 cup white melting chocolates

1 tbsp almond extract


Raspberry Sauce:

1/2 cup fresh or frozen raspberries

2 tbsp sugar


Directions:


In a medium bowl, whisk together the flour, cornstarch, and baking powder; set aside.

In a small bowl, whisk together the almond milk and egg whites; set aside.

Beat the sugar and butter with an electric mixer until all of the sugar is combined, then add the vanilla and almond extract.

While still beating, alternate adding half of the flour mixture, then half of the egg white/almond milk mixture until they are both completely combined. 

Fill cupcake cups halfway, and bake on 350 for 20-25 minutes.


For the frosting, melt the melting chocolate in the microwave until it is smooth. Keep stirring it while you let it cool so that it doesn't solidify again.

In a large bowl, beat the butter with one cup of the confectioners' sugar until it is smooth and fluffy. Beat in a cup of sugar to the butter at a time until they are all combined. Add the almond extract. 

Once the white chocolate is cooled, beat it into the rest of the frosting. Continue beating for around 3 minutes to make sure everything is evenly mixed.

Pipe with an open star tip onto the cooled cupcakes.


 For the raspberry sauce, put the raspberries and sugar and a small sauce pan.


Use a fork over low to medium heat to break down the berries and combine them with the sugar. Be careful not to burn them!

Once they are combined, allow them to remain at a gentle rolling boil over low heat for a minute or so.


Remove the sauce from the heat, but keep stirring so that it stays liquid. Press the sauce through a sieve to get rid of any seeds or burned parts. This will give you a nice, smooth sauce.

You might want to add a dash or so of cold water to help with the consistency.

Drizzle a little of the cooled sauce on the cupcakes...


...and shaved white chocolate.


Depending on your preference, you can leave them like this...


...or you can top it with another raspberry!


Either way, enjoy the cupcakes!