Tuesday, October 28, 2014

Mocha Pumpkin Cupcakes


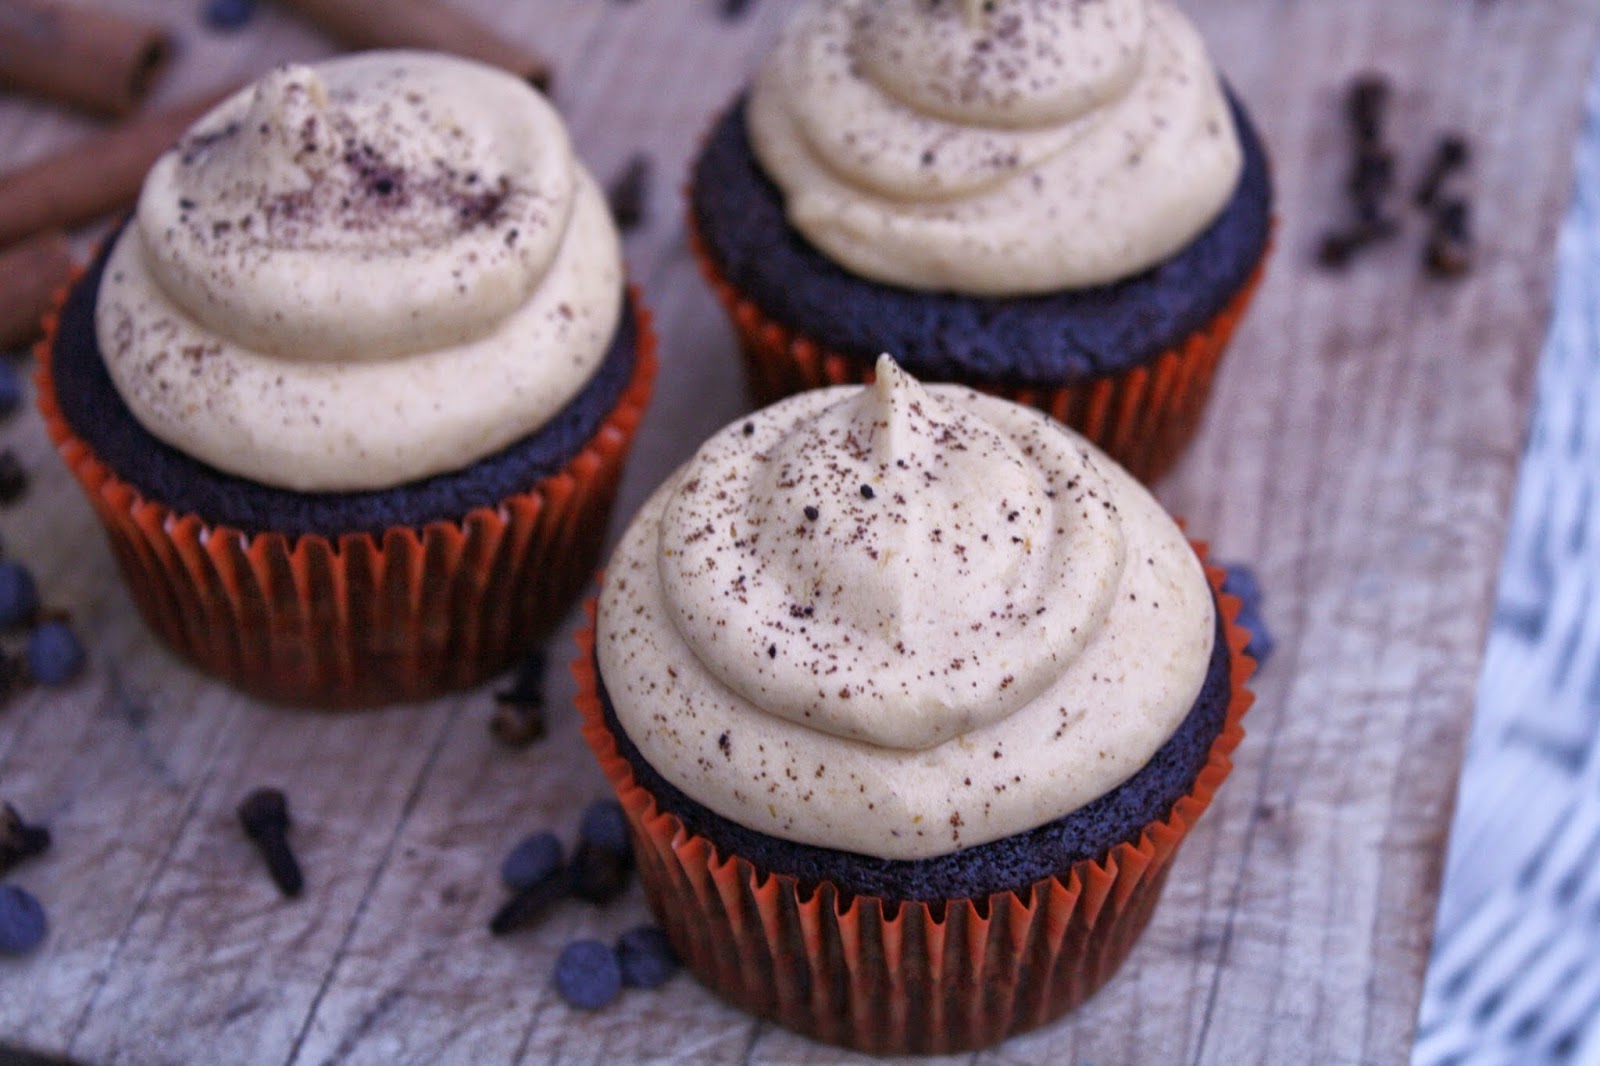
Apple season has almost wrapped up, and now it's time for pumpkin! Everyone loves pumpkin coffee, and I really love chocolate, so why not have mocha pumpkin? The espresso powder added to the chocolate makes it extra rich, and the pumpkin frosting is a perfect seasonal balance to it! Enjoy!


Yields 24+ {about 30}

Cupcakes:


1 cup butter

1/2 cup semisweet chocolate chips

1 cup unsweetened cocoa powder

1 tbsp finely ground instant espresso powder

1 1/4 cup all-purpose flower

1/4 cup cornstarch

1 teaspoon baking soda

1 1/2 teaspoon baking powder

4 eggs

1 cup granulated sugar

1/2 cup brown sugar

2 teaspoons vanilla

1 cup almond milk


Frosting:

1/4 cup butter

1 1/2 cups cream cheese

2 tsp vanilla

1/2 cup pumpkin

1 heaping tsp cinnamon

1/2 heaping tsp cloves

3 cups confectioners' sugar


Directions:


Melt the butter and chocolate together in the microwave.

In a medium bowl, whisk together the cocoa powder, espresso powder, flour, cornstarch, baking soda, and baking powder.

In a large bowl using an electric mixer, beat the eggs, sugar, brown sugar, and vanilla together until smooth.

Add the cooled butter/chocolate and beat until smooth.

While still beating, add half of the flour mixture, then half of the almond milk.

Repeat until everything is added. Stir until just combined

Bake on 350 for 20-25 minutes


For the frosting, beat together the butter and cream cheese until it is smooth with no lumps of butter. Beat in the vanilla and pumpkin.

Add the sugar a cup at a time until all beaten in. Add the cinnamon and nutmeg and beat well.

Pipe with a circle tip and top with sprinkled espresso powder.


Wednesday, October 15, 2014

Caramel Apple Cheesecake


Ok, so I've been on a bit of an apple kick lately, but who can blame me? Apple season is almost over, and I've been waiting for it all year! This cheesecake is so yummy and great, because unlike most cheesecake recipes that I've come across in my years of cheesecake-making it does not need to rest over night! It can if you want it to, but it is not required. I love this because I can make it in the morning and bring it to a party at night...it just makes my life easier. The caramel and apples on top are marvelous too! I do recommend not topping it until you are ready to serve it, that way it won't get soggy in the mean time.


Caramel Apple Cheesecake


Yields 1 9" cheesecake

Cheesecake and Crust:

About 2 packages {not boxes!} graham crackers {enough for about 2 cups crumbs}

1/3 cup butter

1 tsp cinnamon

dash of nutmeg

32 oz cream cheese

1/2 cup plain greek yogurt

1 1/4 cup sugar

2 tsp vanilla extract

5 eggs


Apples:

1 cup apple juice

3 tbsp brown sugar

1 tbsp butter

2 tsp vanilla extract

5-6 medium apples


Caramel Sauce:

1 1/4 cup sugar

1/4 cup brown sugar

2 tbsp water

2 tbsp apple juice

1 tsp vanilla extract 

1 cup heavy cream


*Important!!! Use a 9" springform pan to make this recipe. To make taking the cake out of the pan easier, I suggest stretching parchment paper over the bottom of the pan and then closing the edges of the pan around it, leaving some of the paper visible from the outside of the pan...that way you can just take it off of the bottom and move it to a plate without breaking it. You could also use a cardboard round to do this. *


Directions:


Using a food processor or a rolling pin and Ziploc bag {the old fashion way!}, crush the graham crackers until you have crumbs. Pour the crumbs through a sieve so the crumbs are small and smooth. 


It's good to sift the crumbs because if you have big chunks of graham cracker in your crust that one point can get soggy or too hard, and the crust won't be uniform. Technically you don't need to sift the crumbs, but it helps improve the overall quality of your cake. You need about 2 cups of crumbs {it's good to have a little more than that}, so definitely re-crush the crumbs that were too big to fit through the sieve. 

Add the cinnamon and nutmeg to the bowl that the crumbs are in, and mix with a fork until evenly combined.

Melt the butter in the microwave. Pour the melted butter into the graham cracker crumb mixture, and mix with the fork or your fingers until all of the crumbs are moist. Pour them into the prepared springform pan and press evenly around the bottom and up half of the side of the cake pan. 


Wrap around the outside with tin foil and freeze while you make the cake part.


Preheat the oven to 475. Prepare a water bath for the cake pan by filling a large pan {I used a roasting pan} with about an inch of water. While the oven takes an eternity to heat up, start making the cake.

In a large bowl, beat together the cream cheese, yogurt, sugar, and vanilla until completely combined. Beat in the eggs one at a time. 

Pour the batter evenly over the crust. Put the cake in the water bath, and the water bath in the oven.

Bake at 475 for 15 minutes, then turn the oven down to 350 and bake for 50-60 minutes or until it only jiggles slightly when the pan is gently shaken.

Take out of the water bath and cool for a few minutes, then cover and refrigerate for 4 hours before serving.

For the apple topping, peel and thinly slice 5 to 6 medium apples.


I used several different kinds of apples to improve the flavor.

Put the apple juice, butter, brown sugar, and vanilla into a large sauce pan over medium heat. Melt the brown sugar and butter, and bring the mixture to a boil. 

Once the apple juice has been boiling for 2-3 minutes, add all of the apples into the saucepan. 


Stir with a wooden spoon and cover all of the apples with the apple juice. Stir occasionally and let lightly boil for 10-15 minutes until the apples have softened.


Use a slotted spoon to take the apples out of the liquid and put on a plate to dry and cool down.

For the caramel sauce, put both of the sugars, water, and apple juice in a medium sauce pan. Dissolve the sugars over medium heat. Add the vanilla, and bring to a rolling boil.


Let the sauce boil for 3-5 minutes until it has a dark caramel color. While whisking, slowly pour the cream into the boiling caramel and keep whisking until it is combined. Remove from the heat and cool to warm before putting it on the cheesecake.


Assembly:

Run a smooth butter knife around the inside of the pan to prevent the cheesecake from sticking to it. Remove the sides of the pan, and transfer the cheesecake to the plate you will be serving it on. I like to also remove the bottom of the pan, but you can choose to leave it underneath the cake.

Pile the apples on top of the cheesecake.


I recommend waiting until you plan on serving to pour the caramel on top, as you don't want the cake to get soggy. If the caramel sauce is cooled down to warm, pour it on top. 


If you have extra caramel sauce, save it in a small pitcher so you can offer it per slice. Enjoy!

Wednesday, October 8, 2014

Spiced Apple Cake


Yay! My first fall recipe!!! I don't know about where you live, but here in New England the apples are ripe for the picking, and I absolutely LOVE apple picking. It was always one of my favorite childhood memories; my dad would always take me and my sisters apple picking with my grandpa and aunt {both of whom have passed}, so apple picking is a time when I get to think back onto all of the good times we got to have with them while they were still here...it really puts me in a thankful mood even though Thanksgiving isn't here yet :). This Spiced Apple cake was made especially for my wonderful dad's birthday! I know he liked it, so I hope you do too.


Spiced Apple Cake


Yields 3 8" cakes


Cakes:

1 3/4 cups all-purpose flour

2 tsp baking powder

1/4 cup cornstarch

1 tsp cinnamon

1/8 tsp nutmeg

1 cup almond milk

4 eggs

2 cup sugar

1/4 cup sweet cream, salted butter {softened}

1 tsp vanilla extract


Frosting:

2 cups butter

4 cups confectioner's sugar

2 tbsp vanilla


Spiced Apple Topping:

4 medium sized apples

2 tbsp butter

2 tbsp brown sugar

2 tsp lemon juice

1 tsp cinnamon 

1/4 tsp nutmeg

about 1 cup water


Directions:


In a medium bowl, whisk together the flour, cornstarch, baking powder, nutmeg, and cinnamon; set aside.

In a small bowl in the microwave, melt together the almond milk and butter; set aside to cool.

Beat the sugar and eggs with an electric mixer until all of the sugar is combined, then add the vanilla extract.

While still beating, alternate adding half of the flour mixture, then half of the butter/milk mixture until they are both completely combined. 

Fill cake pans halfway, and bake on 325 for 30-35 minutes.


While the cakes are baking, make the apples so that they have time enough to cool down.


For the apple topping, peel and cube the 4 medium apples. 

Put the cubed apples in a large saute pan with the butter and brown sugar. Melt the butter and sugar over high heat; stir constantly to make sure all of the apples get coated.

Once the butter is melted, add the lemon juice and keep stirring. Make sure the apples are not sticking to the bottom of the pan!

If the apples at any point start sticking to the pan, add a little water to put some moisture back into it.

After 3-5 minutes, test an apple with a fork to see if it is tender {like it would be if it had been baked into an apple pie}. If it is not, let it saute for a little longer. If it is, add the cinnamon and nutmeg. Make sure all of the apples get evenly coated with the spices!

The cinnamon will most likely pull a lot of the moisture out of the apples, so add a little bit more water until you have the consistency you want.


Set the apples aside to cool while you make your frosting.


For  the frosting, beat the butter until it is smooth and fluffy {about 5 minutes}.

One cup at a time, beat in the confectioner's sugar. Make sure you scrape down the sides of the bowl after each addition so that the end result won't be lumpy.

After all of the sugar is added, beat in the vanilla extract.


Assembly:

Pop the cakes out of the pans onto cardboard rounds {this just makes transporting easier}. Put the first cake onto a cake stand, or whatever else you will be serving your cake on.

Pipe the frosting {without using a tip, just the bag} onto the cake starting from the center in a circle until the whole top is covered, leaving about 1/2 inch of room on the edges. Repeat with the other layer, and place the final layer of cake on top.


Pipe the same kind of circle on the top of the cake, but leave a little more room around the edge. Smooth out the piping job with a butter knife with a flat edge or a small metal spatula.


Hopefully your apples have cooled by now, but if they haven't just pop them in the freezer for a minute.

Pour/spoon the cooled apple topping onto the top of the cake. Don't be afraid to pile it on! There shouldn't be any apples left over {unless of course like me, you ate a few :P}.


Enjoy this yummy fall-time cake with some cider!